twitter
    Find out what I'm doing, Follow Me :)
Showing posts with label ubuntu. Show all posts

Enable htaccess Apache in Ubuntu


Enable htacces for directories

we know that htaccess permission must on apache web server like making SEF urls, directory permissions..etc.here we discuss about how to check .htaccess enabled.
Before we begin this tutorial, please make sure you make a backup copy of the originalhttpd.conf apache configuration file located in apache installation folder in case we make a mistake, this way we can always go back to the original configuration file
Now open
httpd.conf
file with note pad and find the below text
<directory />
Options FollowSymLinks
AllowOverride none
Order deny,allow
Deny from all
Satisfy all
</directory>
Then replace AllowOverride none to AllowOverride All. Modified version looks as below
<directory />
Options FollowSymLinks
AllowOverride all
Order deny,allow
Deny from all
Satisfy all
</directory>
Above change tells the apache to use .htaccess as per directory bases.
Now we can use .htaccess files .

Remember

Remember while uploading .htaccess file to remote server make sure the file transfer in ASCII mode, generally with windows operating system FTP programs use binary mode.
Generally FTP programs doesn’t display the .htaccess files by default ,we must force the FTP program to show hidden files like .htaccess files.
When you save .htaccess file with note pad it saves as .htaccess.txt .Make sure .htaccess is a file extension not a file name with empty name.

Increasing Permgen size in your Web Server

In previous posts , we had talked about Increasing the Heap size of your server
Here will talk about the Permgen space , how it is different from heap size and why just increasing the heap size will not help you in getting rid of this error 
Java.lang.OutOfMemoryError: PermGen space

The permanent generation should not be ignored, because you need enough memory allocated to it to hold all classes in all of your applications including the JSP’s. So if you have an application which uses a good number of third party libraries , has lot of files , you will definitely need a lot of Permgen space. If you are running two applications on the same server , definitely allocate some good chunk of memory to your Perm gen.
How to increase PermGen?

When you add this line in your catalina.bat or catalina.sh

export JAVA_OPTS=-Xms128m -Xmx192m

It only increase heap size. This is how it would look like (assuming your default PermGen is 64MB)

Increasing PermGen on tomcat

PermGen does not change
To increase PermGen , it would be

export JAVA_OPTS=-Xms128m -Xmx192m -XX:MaxPermSize=256m

See how the size of PermGen has increased.

Perm Gen increased

Perm Gen increased
This was done on Tomcat 6.0.14

How to increase heap size in Tomcat 6

Most of us who have worked with Apache-Tomcat in productions systems, would have faced out of memory errors sometimes or other.  It is not that it always happens in tomcat but let us look at why does this occur and how to solve it.


Understanding Java Virtual Machine 

A Java Virtual Machine on 32-bit operating systems typically has a maximum heap size of 64Mb. The JVM heap space is where all Java objects are stored, as well as memory used by the garbage collector. Sun recommends increasing this value for server applications.

Large server applications often experience two problems with these defaults. One is slow startup, because the initial heap is small and must be resized over many major collections. A more pressing problem is that the default maximum heap size is unreasonably small for most server applications.
64MB  is the heap size in tomcat as well by default and is too less for real world systems. When your application runs and you are able to analyze the app, this is what you would see

heap size in tomcat
heap size in tomcat 

How to increase the heap size?

On windows :

Go to catalina.bat and set this
set JAVA_OPTS=-Xms128m -Xmx192m

On linux :

export CATALINA_OPTS="-Xms16m -Xmx256m";

-Xms – is the minimum or initial size of your heap
-Xmx – is the maximim size

export JAVA_OPTS="-Xms128m -Xmx256m";

On linux , you can also set in setenv.shin the bin folder. The catalina.sh script has logic to call into this script.

Note that CATALINA_OPTS is a better place than JAVA_OPTS. The former is only used when actually starting the Tomcat instance. JAVA_OPTS is also used to start JVMs that only interact with Tomcat (for example the JVM instance that is used to send the shutdown-message to a running Tomcat instance).

You can have a look at this article High Performance in Tomcat. Although this article is pretty old (dates back to Tomcat 4) , it still has lot of good points.
Once you have set the heap , how to check heap size ?

How to check heap size in linux

The output of jmap -heap <pid>.
Some more information can be found here http://wiki.apache.org/tomcat/OutOfMemory

Light Painting in Gimp

This is my second Gimp Tutorial. The original tut was made by Fabio Sasso in his wonderful site Abduzeedo. He has done the light painting tuts for Photoshop,Pixelmator,Firework and i decided to try the tuts with gimp. It took me an hour trying to find the right combination of effects and blend modes in gimp, and i did it! Here is my tuts;

If u don't have Gimp.You can download it here.It's free!

P/S : Click the image for larger view.


lighteffect


P/s: The original Photoshop tutorial can be found HERE. You also can find the Firework and Pixelmator tutorial version too in Abduzeedo site.


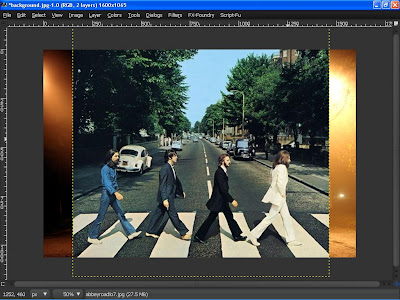
1.Open the background image.you can download it from here.


2.Now get an image of The Beatles Abbey Road cd.Drag the The Beatles Abbey Road CD cover photo to the image .


3.Resize it to larger image using scale tool.


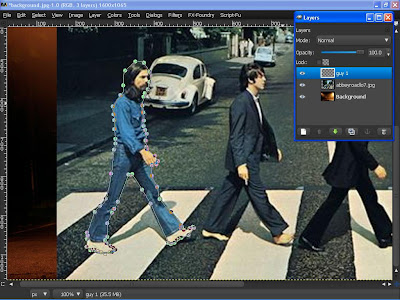
4.Use Path Tool(P) and create paths around the guy in the photo.


after that created a new layer and named it as Guy 1.Dont forget to chose your foreground color white and black..


5.Then Select>From Path(shift+v).it will select the path that you make using the Path tool.


Go to Edit>Strokes Path.Strokes Line is 11 px,Solid Color and Line style>Dash preset>Line and dont forget to click antialising.and then clik Stroke.Use the image below for reference and values.Click the image for large view.


6.The next thing is go to Select >None(Ctrl+D).


7.Repeat the steps 4 until steps 6 to other guy.


hide the The Beatles Abbey Road cd layer and u'll see the stroke line at the guy 1 layer.


8.Change the layer mode to soft light.Apply a Gaussian Blur with 2 radius.And then duplicate the guy 1 layer 4 times.After that create a new layer and rename it as rectangle.


9.At the rectangle layer,create a rectangle using the rectangle select tool(m).


10.The next things is go to Select>Border.Chose 5 pixel for border selection


11.Fill the border selection white our foreground color(white).Go to Edit>Fill with FG Color.


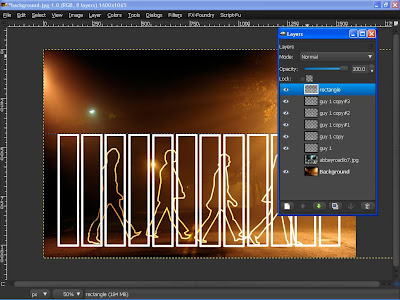
12.See those blue guides? Those are Guides.Just add a guide so we can align the rectangles like I did in the image below.. I like using them because it really help me.If you want to turn them on and off, go to View > Shows Guides


13.Duplicate the rectangle and align them.


After that merge down all the copy rectangle layer to one single rectangle layer.


14.Resize the rectangle a little bit smaller like the image below


15.Use the Perspective tool(shift+p)to adjust the perspective of the rectangles.


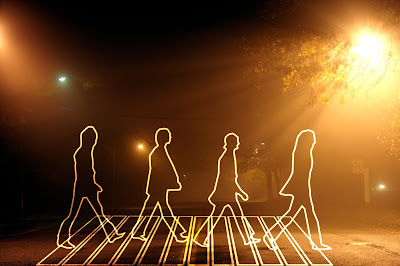
15.Change the rectangle layer mode to soft light and then duplicate it 3 times.Finished!


Final result!


Download the Gimp Xcf file here

Gimp Tutorial: Awesome Bokeh Effect in Gimp

It was fun to to follow Abduzeedo tutorial for making bokeh digital effect in Photoshop (i'm using photoshop and gimp) and i really excited when i managed to do similiar effect in Gimp. So i decided to make a Gimp tut for this one..it's been over a months since my last tutorial and i think after this i'll make more Gimp tuts..Click More Inside The Post to read the tutorial.


Gimp Digital Bokeh


P/s: This tutorial has been converted from the original Photoshop tutorial into Gimp. The original Photoshop tutorial can be found HERE in Abduzeedo site.


Before you try this tutorial,please download my Eclipse brush where i made it by myself. You can download the brush by click HERE. After download it, paste the brush to Gimp folder. And i'm using Gimp 2.6 for this one.

P/S : Click the image for larger view.


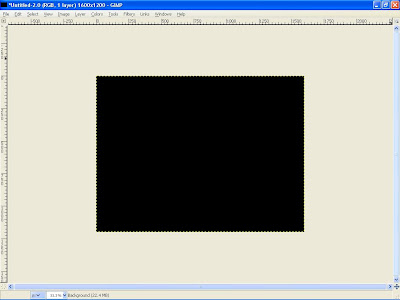
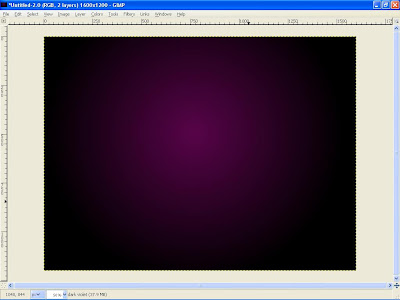
Create new document. I'll used 1600 x 1200. Fill the background with blackcolour .


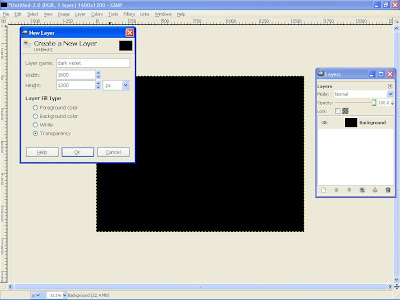
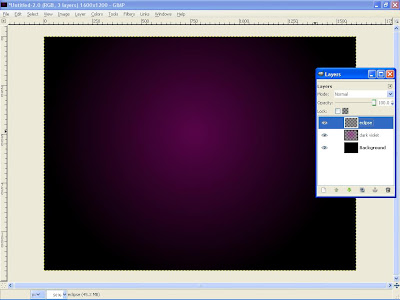
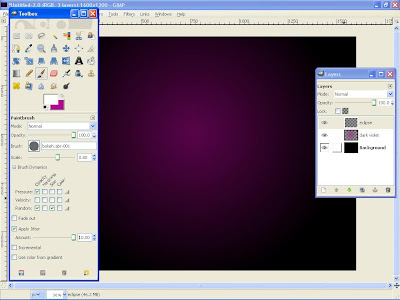
Then create new layer.I renamed it as dark violet.


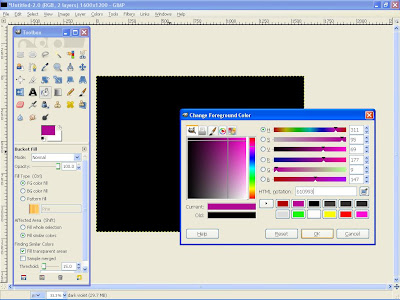
Choose a dark purple. I'm using #b10993.


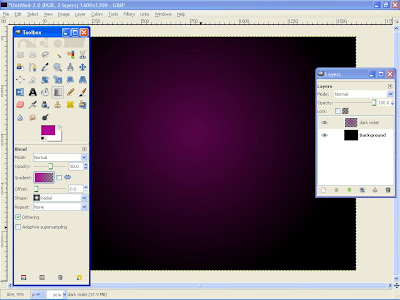
Select gradient tool, Radial for the shape and low the opacity to 50. Click the image for larger view.


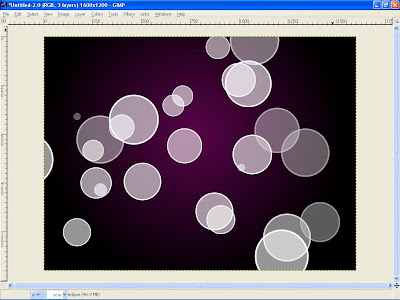
Now create a new layer and i renamed it as eclipse.


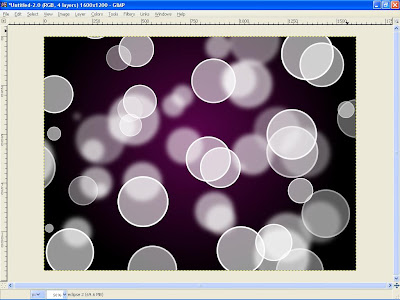
Select the brush tool. and I'll using my Eclipse brush. Use white color for the brush.Then Select brush dynamic options and for the values use the image below.


Now we'll paint some ellipses at the eclipse layer.


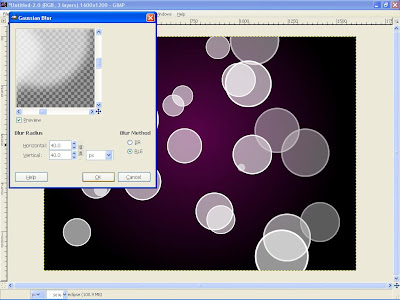
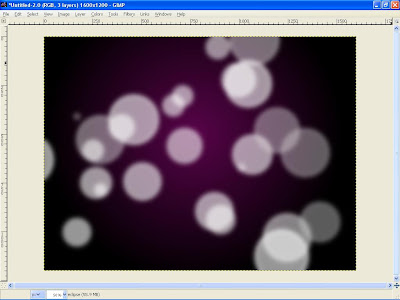
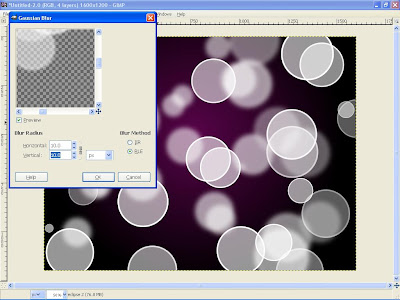
Go to Filters>Blur>Gaussian Blur. For this first layer use 40 pixels for the Horizontal and 40 pixels for the Vertical.


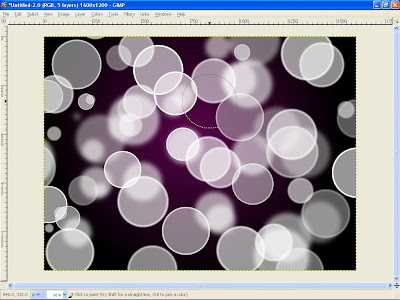
Create another layer ( I named it eclipse 2 ) and start painting again.


Go to Filters>Blur>Gaussian Blur. For this second layer use 10 pixels for the Horizontal and 10 pixels for the Vertical


Create another layer and repeat the previous step, this time however i'll Apply the Gaussian Blur to this layer as well, but use only 1 pixel for the Radius.


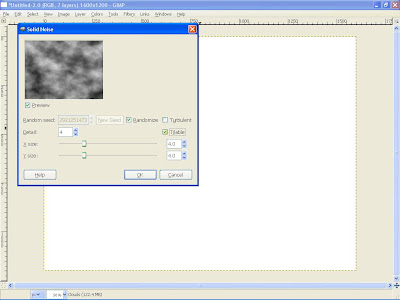
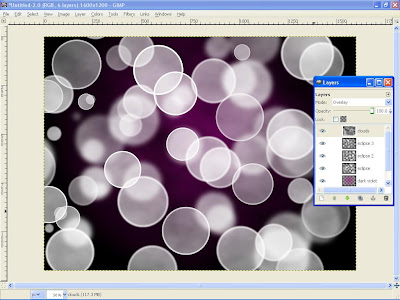
And then create a new layer and i named it as Clouds.Fill it with white. Go to Render>Clouds>Different Clouds.and apply to the layer. I use 4 for the Detail, Randomize and Tileable.After that changes the layer mod to Overlay.


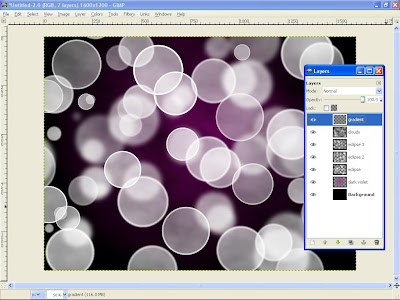
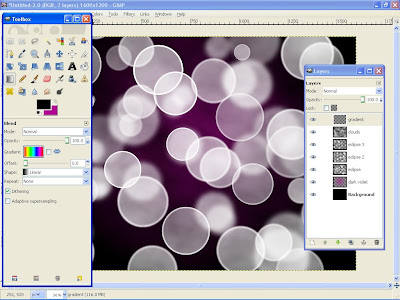
Create another layer and named it gradient.


Using the gardient tools select Full Saturation Spectrum Gradient , 100 for the opacity and Linear for the shape.


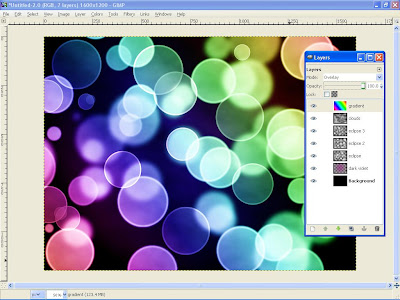
Apply the gradient to the layer. Change the layer mod to Overlay.U'll see a nice effect there.


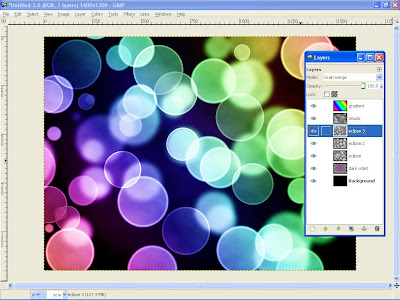
Go to layer eclipse 3 and change the layer mod to Grain merge.


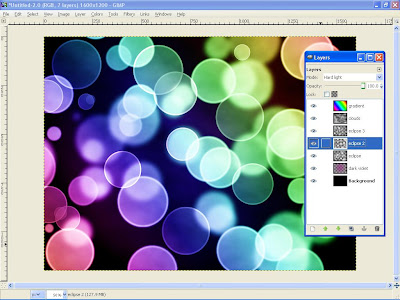
Last,go to layer 2 and change the layer mod to Hard Light


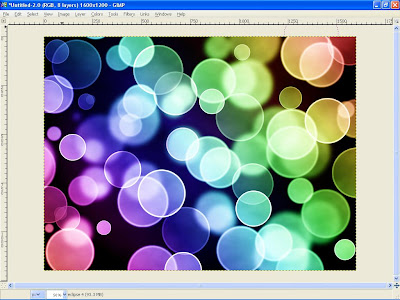
Finish!


Result


Below is my result using Photoshop..You will noticed that Gimp is a great free editing software ever because it can achieve almost the same as Photoshop result.


hope u like it..i take no credit of this awesome effect.credit all to Fabio Sasso for the inspiring idea.


I also included the Xcf file.
Click here to download the Xcf file used for this tutorial


UPDATED: 2 FEBRUARY 2009

I HAVE MADE NEW BOKEH .GBR BRUSH SO FEEL FREE TO DOWNLOAD IT HERE. THIS IS MY NEW RESULT USING THE BRUSH. MADE IN GIMP 2.6.4.


BOKEH RESULT2