This is my second Gimp Tutorial. The original tut was made by Fabio Sasso in his wonderful site Abduzeedo. He has done the light painting tuts for Photoshop,Pixelmator,Firework and i decided to try the tuts with gimp. It took me an hour trying to find the right combination of effects and blend modes in gimp, and i did it! Here is my tuts;
If u don't have Gimp.You can download it here.It's free!
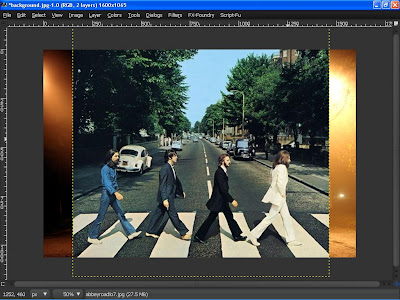
P/S : Click the image for larger view.
P/s: The original Photoshop tutorial can be found HERE. You also can find the Firework and Pixelmator tutorial version too in Abduzeedo site.
1.Open the background image.you can download it from here.

2.Now get an image of The Beatles Abbey Road cd.Drag the The Beatles Abbey Road CD cover photo to the image .

3.Resize it to larger image using scale tool.

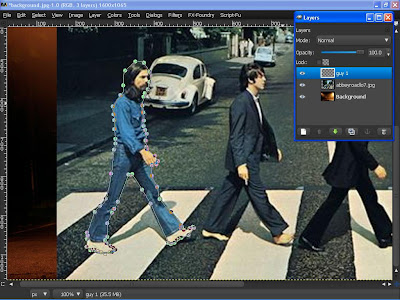
4.Use Path Tool(P) and create paths around the guy in the photo.


after that created a new layer and named it as Guy 1.Dont forget to chose your foreground color white and black..

5.Then Select>From Path(shift+v).it will select the path that you make using the Path tool.

Go to Edit>Strokes Path.Strokes Line is 11 px,Solid Color and Line style>Dash preset>Line and dont forget to click antialising.and then clik Stroke.Use the image below for reference and values.Click the image for large view.

6.The next thing is go to Select >None(Ctrl+D).

7.Repeat the steps 4 until steps 6 to other guy.

hide the The Beatles Abbey Road cd layer and u'll see the stroke line at the guy 1 layer.

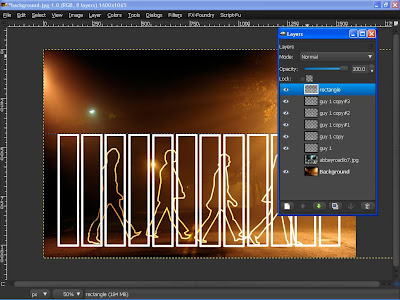
8.Change the layer mode to soft light.Apply a Gaussian Blur with 2 radius.And then duplicate the guy 1 layer 4 times.After that create a new layer and rename it as rectangle.


9.At the rectangle layer,create a rectangle using the rectangle select tool(m).

10.The next things is go to Select>Border.Chose 5 pixel for border selection


11.Fill the border selection white our foreground color(white).Go to Edit>Fill with FG Color.

12.See those blue guides? Those are Guides.Just add a guide so we can align the rectangles like I did in the image below.. I like using them because it really help me.If you want to turn them on and off, go to View > Shows Guides


13.Duplicate the rectangle and align them.


After that merge down all the copy rectangle layer to one single rectangle layer.


14.Resize the rectangle a little bit smaller like the image below

15.Use the Perspective tool(shift+p)to adjust the perspective of the rectangles.

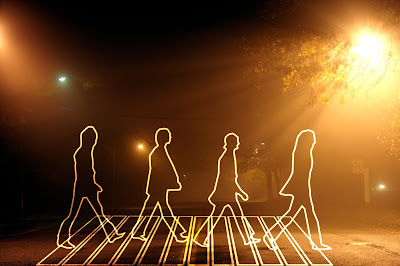
15.Change the rectangle layer mode to soft light and then duplicate it 3 times.Finished!


Final result!

Download the Gimp Xcf file here


0 comments:
Post a Comment